Techniques & Materials
Articulating Tape: I Can See Clearly Now
By Kevin Kwiecien on January 16, 2014 | I hope I'm not the only dentist that struggles when placing some kind (really, any and all kinds) of tape, ribbon, or colored paper into my patient's mouth. If I am, stop reading now.
No matter what medium of articulating ribbon that I use, it still seems to get wet, crumple up or not mark on the teeth that I thought it would.
We can talk about the best type of colored material or the best color for a type of restoration until we are nauseous; however, what's more important is a proper drying technique so that the ribbon will mark.
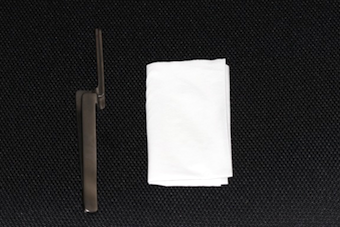
I became quite adept at using the air from the air/water syringe to blow saliva directly onto the occlusal surface, especially on the lower arch, even after asking my patient to swallow. My marks became much more accurate and pronounced no matter what material I was using when I started using a properly folded piece of tissue and Miller forceps.


Here are a few helpful steps:
1. Use the crease already in the tissue for the first fold.
2. Fold that in half again, in the opposite direction, as you would if you were trying to make a smaller square.
3. Fold it one more time in the similar manner, so that there are a total of three folds including the initial fold from the existing crease in the tissue.
4. Now fold each long side towards the middle so that the open (messy) ends meet in the middle. We don't want these to get wet or frayed.
5. Fold those over each other and tear the long piece in half so that you have two pieces ready to go.


When placing the tissue in the forcep, place the torn end towards the handle and the open end into the clamp.
Regardless of how perfect the fold is or what technique you use, the idea is to have a very dense piece of tissue with all loose ends that would have the potential to get wet and messy as hidden as possible.
Before you place any articulating medium in the mouth, place the tissue over the quadrant that you are checking and ask the patient to, "lightly tap twice to dry." Ask them to stay open while you place the colored ribbon to mark the teeth.
Even if you don't quite always know what you are looking for or exactly how to adjust it, you will at least have a more accurate and clear view.