Technology to support dental digital workflows have evolved tremendously over the last decade, allowing the treating team to diagnose, treatment plan, and execute therapy predictably and consistently using digital radiography, digital photography, intraoral scanning, design software, 3D printing and milling, to name just a few technologies.

Dental Digital Workflow: A Visual Essay

This visual essay shows a few of the steps involved in the reconstruction of a maxillary arch that was severely worn due to extrinsic dental erosion. In a previous article, we discussed this condition and how relatively common it is to find it in our patients.

The patient depicted here is a 40-year-old male who admitted drinking nine Diet Cokes every day for the last 20 years. Following is a step-by-step illustration of how the case developed, using a digital workflow to increase efficiency and predictability.

close up of front maxillary teeth with excessive wear and erosion at initial presentation of the patient
Figure 1: Initial presentation of the patient. Excessive wear and erosion were noted.
digital full mouth intraoral scan
Figure 2: Initial intraoral scan.
digital wax-up of maxillary teeth
Figure 3: Digital wax-up made to ideal contours.
3D models of maxillary and mandibular teeth
Figure 4: Once the set-up was finalized, 3D models were printed.
Close up of esthetic prototype in patient's mouth
Figure 5: Esthetic prototype tried in the patient's mouth to assess esthetic and phonetics.
Using waterlase on patient's teeth for gingival esthetic recontouring
Figure 6: Waterlase was used for gingival esthetic recontouring to improve teeth proportions.
Front view of maxillary teeth after preparations were made
Figure 7: Minimal preparations were made, and chord was packed before scanning.
Digital intraoral scan of front teeth after preparations
Figure 8: Intraoral scan after preparations using Primescan.
CEREC design for provisional restorations
Figure 9: CEREC design for provisional restorations.
PMMA provisional restorations milled
Figure 10: PMMA provisional restorations milled.
Provisional restorations on the printed model
Figure 11: Provisional restorations on the printed model to confirm arrangement and contours.
Intraoral view of the provisional restoration on front maxillary teeth
Figure 12: Intraoral view of the provisional restorations.
STL view of the case on the planning software
Figure 13: STL view of the case on the planning software.
Digital scan with anterior design prepared for layering and posterior design for monolithic restorations
Figure 14: Anterior design prepared for layering and posterior design for monolithic restorations.
Definitive restorations
Figure 15: Definitive restorations.
Intraoral view close up of front maxillary teeth two weeks after insertion
Figure 16: Intraoral view two weeks after insertion.
Before (left) and after (right) view of maxillary rehabilitation
Figure 17: Before-and-after view of the maxillary rehabilitation.

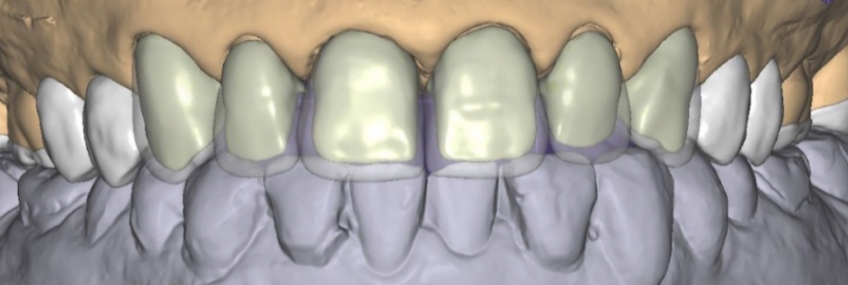
This visual essay illustrates a step-by-step dental digital workflow implementing reconstructive treatment of a maxillary arch that was severely worn due to extrinsic erosion, allowing the dental team to be predictable and efficient throughout therapy.

Ricardo Mitrani, D.D.S., M.S.D., is a member of Spear Resident Faculty.


SPEAR ONLINE

As a Spear member, you can assign a Spear Online practice delegate to assign courses, track team progress and edit team member accounts on your behalf. Check out the “Getting Started with Team Training” guide to learn more about how a team training partner can help you achieve your goals with Spear Online.

LEARN MORE