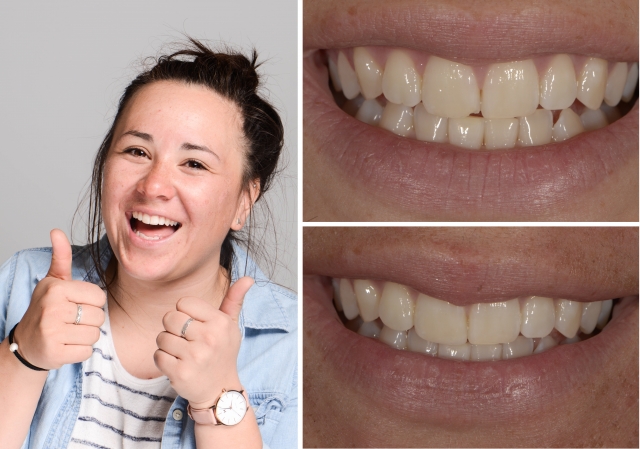
A Simple Process for Making Beautiful Anterior Composites - The 'Dentin Samich' Technique
By Dawn Wehking on August 12, 2018 |
Who doesn’t love a good sandwich?! They’re quick, easy to make, and cost-effective. And if you say “samich,” they’re fun too. A dentin samich is just that - it’s quick, easy, cost-effective and fun to do because it still looks great!
You’re a great dentist. You’ve invested in your advanced education. Given the time and the right materials, you can build an anterior composite that would “wow” the pants off of Frank Spear. However, in your day-to-day general practice, you’ve got a lot on your plate: You’ve got hygienists waiting for you, a printer that keeps breaking, a to-do list that never ends and other patients to treat.
Hang in there! Follow these nine simple steps to make a dentin samich - a beautiful anterior composite without all the fuss.
1. Bevel:
- Facial feather: I use a round-end cylinder diamond (Brassler 35005.31.054) to create a 2 mm bevel on the facial that feathers out from dentin to enamel. I use this because it’s one of my main burs that is always in my setup. You can use any diamond for this; use what’s in your toolbox.
- Facial starburst: Don’t overthink this. Use that same diamond and go nuts for five seconds. The key is to create different depths, lengths and widths to your bevel. This will help your restoration blend seamlessly.
- Lingual 1 mm chamfer for strength.

2. Etch and bond: You’re a rock star Spear dentist, you already know how to do this!
3. Use your finger: Since you’ve got a lot on your plate, maybe you didn’t have time to do a mock up, wax-up or a putty matrix. Use your finger in place of the putty matrix and pack your first layer of composite.
4. Enamel: This layer should be less than 0.5 mm thick so that you have room for your next two layers. You don’t need to measure this, just make it thin.

5. Dentin: Dentin-shaded composite is more opaque than enamel. This will allow you to mask the transition between composite and tooth structure. Add your dentin layer and feather it over the facial bevel. Use your explorer or IPC to create mamelons. Create your lobes, and just when you think they're perfect, mess them up a bit. Natural dentin is not perfect and smooth. Add a little texture here so that light will hit your restoration and deflect in a way that looks natural.
(Note: Don’t make this layer too thick! It’s really important to make sure you still have facial space for the last layer of enamel.)

6. Enamel: Add your last layer of enamel to full contour.
7. Glycerine: I know you’re busy, but you can’t afford to skip this step! It literally takes 20 seconds to guarantee that you’ve cured the very last layer on your restoration.

8. Polish: When time is an issue, I use three burs to polish. First, I use a fine flame diamond to shape the restoration to final contour. Second, an Enhance disk (Dentsply Caulk) eliminates any transition between composite and enamel (this will polish but also remove composite; be gentle). Next, I return with a fine flame diamond to create surface texture. My final polish is a brush point composite polisher (Brassler D209003.21) with Enamelize polishing paste (Cosmodent).


9. Go do your hygiene check, for Pete's sake!
Essentially, with the dentin samich technique, you are skipping all of the cool effects (stains, translucency, etc.), but ensuring that you’ve masked the layer between natural tooth and restoration. Using this technique, you can provide a higher level of restoration while maintaining a schedule that pays the bills.
Dawn Wehking, D.D.S., M.A.G.D., Spear Visiting Faculty and Contributing Author
www.DentistLafayette.com
Free Dental Lesson: Restorative Materials
As you've just read, your material selection can be a huge factor in establishing clean composites and ensuring better post-op outcomes. Better understand the material choices available to you with this free Restorative Materials lesson.
WATCH NOW