The Extended Series of Dental Photographs
In a recent article in this photo series, Dr. John Carson discussed the six images to take of every patient. I take those images at the beginning of every new patient exam, and every patient in my practice has those photographs on record. In addition to their value in co-discovery with the patient, they’ve helped review treatment before the patient is in the chair (to mentally prepare for what you’re up against), showing patients comparison photos over time, and referring back when a patient breaks something to see the “before” situation.
Occasionally, a patient comes to the office having “found something new” since the recent treatment was provided. Having a photo documentation of their mouth is invaluable before you work on them. If you work on a back tooth and the patient comes in and shows you a small chip on an anterior tooth that they think is new (which happens often when people are hyper-sensitive to their mouth following dental treatment), there doesn’t have to be a discussion about when it happened and “who did it.” I can’t emphasize enough how imperative a camera is to my practice!
While the series of six photographs is invaluable for new patient exams, when we have a patient who is interested in a large amount of dentistry or looking to move forward with a complex restorative case, there are additional photographs that are necessary to plan treatment effectively and communicate with the patient as well as the lab or other specialists on the team. Here I’ll review the extended series of photographs.
During the Facially Generated Treatment Planning workshop, you’ll learn a series of 21 photos to take in the extended set. I’ll show you some of my favorite additional photos and explain why.
Full Face Photo
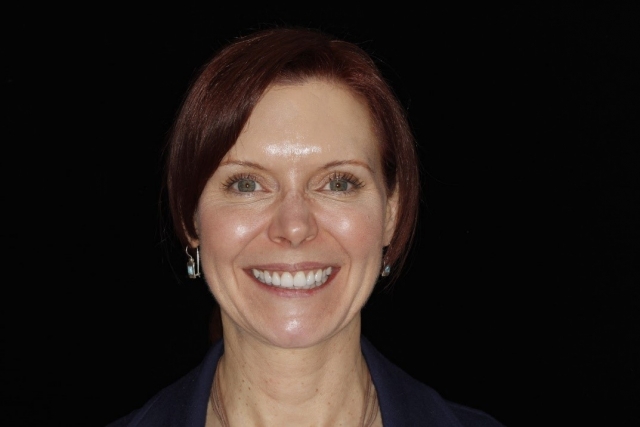
I take this photo of every new patient in addition to the six photos discussed in John Carson’s last article in this series. I like having a profile picture in the patient’s chart so that everyone on the team can quickly put a face to the name when a patient is scheduled to be in the office, or when they call on the phone.
In addition to helping with the flow of the office, this is an invaluable picture for treatment planning a case. It can allow a patient to show you what they like or don’t about their smile from a distance, which can elucidate details they don’t explain to you in the smile photo. I’ll often have patients look at this photo and start pointing out things they don’t like about their face that the dentistry will or will not alter, and it’s good to address those concerns up front.
Lip at Rest Photo, Full Face
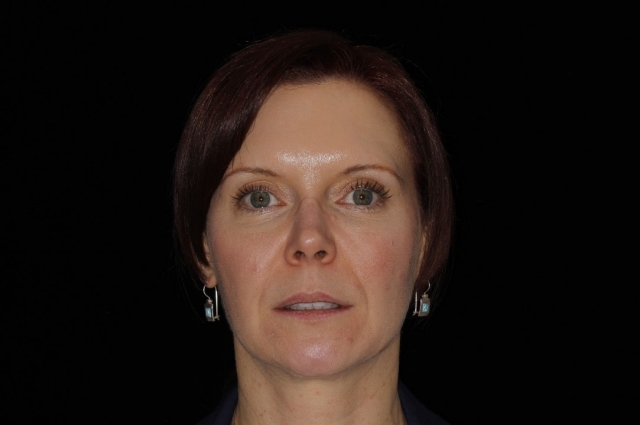
This photo helps in the same way the full-face smiling photo does, but it further allows you to see the lip mobility compared to the smiling photo, the midline at rest, and the tooth display at rest.
Lip at Rest Photo, Close Up
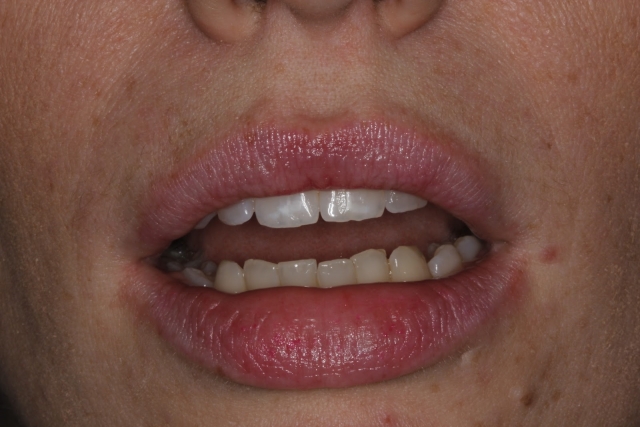
This photo is invaluable in locating the incisal edge positions pre-treatment. Although it is not the only factor that helps to determine where the post-treatment incisal edge position should be, it gives you a parameter for how much length you can add.
The photo above is an excellent example of how the bottom teeth can also show when they are super-erupted. Patients often say, “But I don’t care about the bottom teeth because no one sees them.” Sometimes, this photo can do everything I need by showing the patient what everyone else sees. When this photo doesn’t do that, there’s always video!
Profile Photo
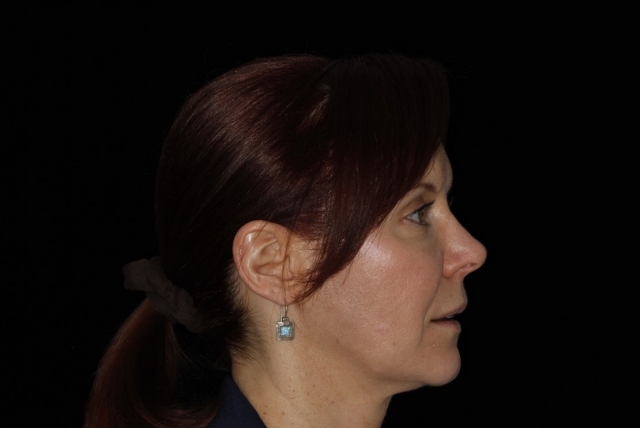
A profile shot helps you evaluate where the teeth are in the face in a way that no other photo can. I’ll usually take two profile photos, one in repose and one smiling. Without a ceph, you can see how the teeth and lip support relate to the forehead, nose, and chin to get an overall feel for the case. If you’re communicating with a specialist on the treatment, your orthodontist will love this heads up before they see the patient!
Teeth Together, Retracted
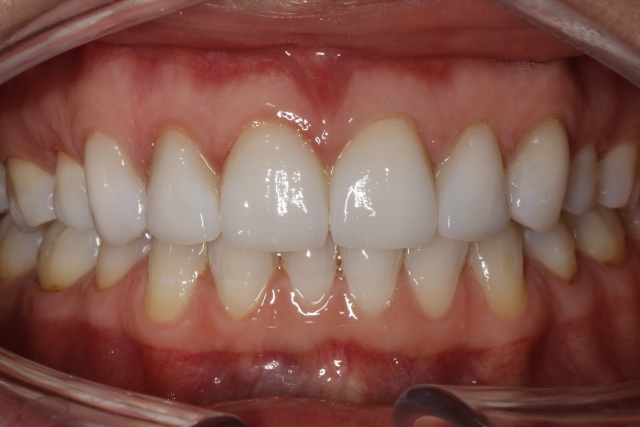
Although the retracted teeth apart photo is my favorite in the series, it is really helpful in certain situations. When you have a patient with severe anterior tooth wear and supereruption present, this photo shows how the maxillary teeth can completely swallow the mandibular teeth when in occlusion.
Teeth Together, Retracted Lateral View
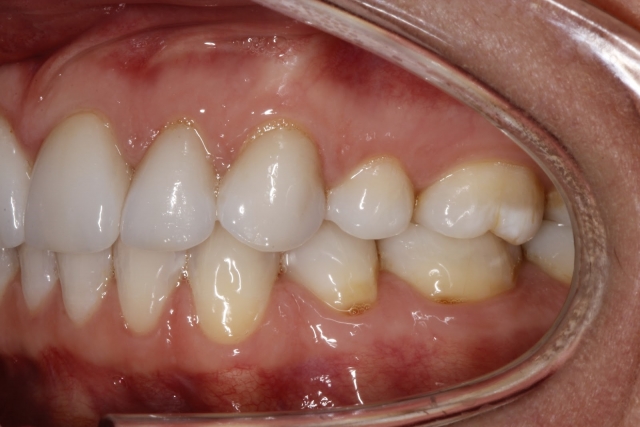
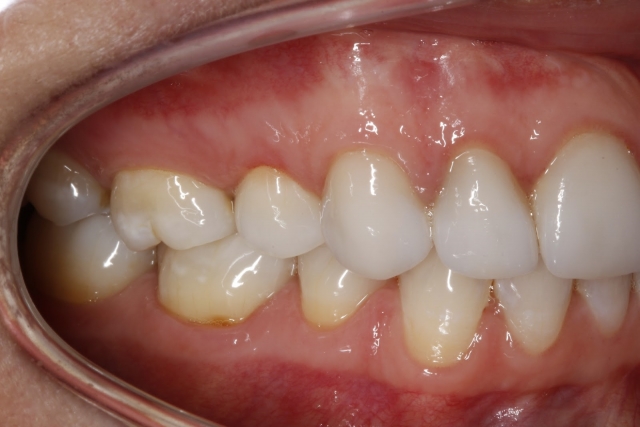
I usually use these two photographs for myself more than for the patient. The six original photos John Carson talks about in his article show the teeth apart, and retracted photos are great for helping the patient see their mouth.
These photos help me in two significant ways. The first is that it gives me an overall idea of how the teeth fit together and their occlusal scheme before I’ve taken records on the patient. It allows for communication with specialists and generating initial treatment thoughts before the patient has returned for a review of findings or records appointment. In addition, I like to have these photos on hand in case the lab calls with a question about articulation. I’m much more confident answering questions when I can quickly view how the teeth come together. It has occasionally saved me from returning the patient for a separate appointment.
Magnified Photos Using a Contraster
My last favorites from the extended photos are the magnified photos with a contraster. I’ve tried all the contrasters on the market, and still haven’t found one I like. I was recently a patient in Gregg Kinzer’s office, and he had fabricated his own. I’m waiting for him to bring his Sharpie contraster to market!
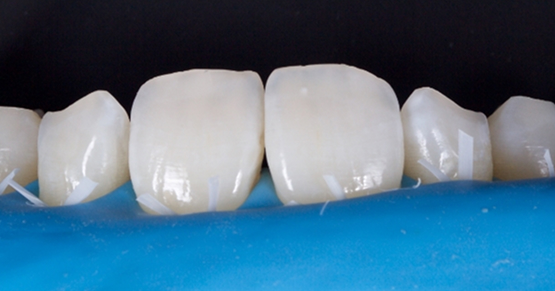
I find the metal contrasters to be too reflective, and the ones covered by black silicone tend to pick up dust and debris that becomes visible in the photo. Here’s what the metal one can look like if you aren’t angled quite right:
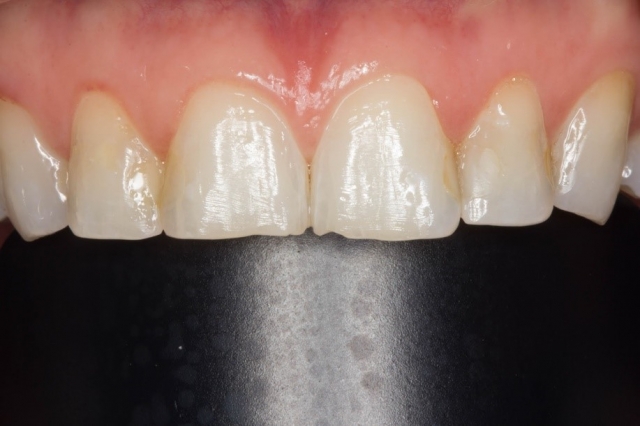
Although I still haven’t landed on a perfect contraster (I’m open to suggestions in the comments section below!), I love taking contraster photos both for myself and the patient.
We as dentists can hone in on problems like anterior tooth wear, but sometimes, the patient becomes so fixated on their need to wax their upper lip area that they completely miss the point you’re trying to make with their teeth! The contraster photo can be excellent to highlight tooth wear, malposition, or surface texture. It also makes your before-and-after photos clean and dramatic.
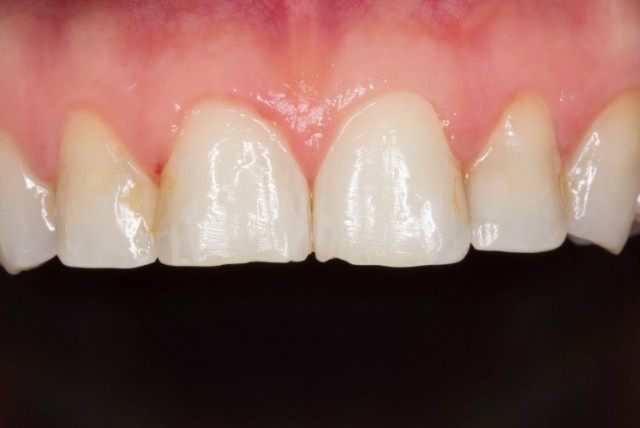
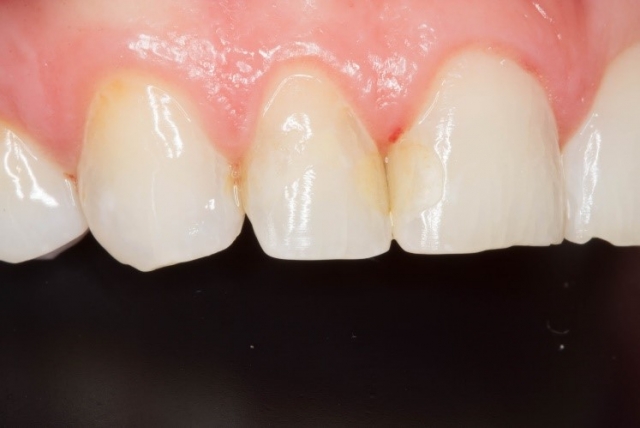
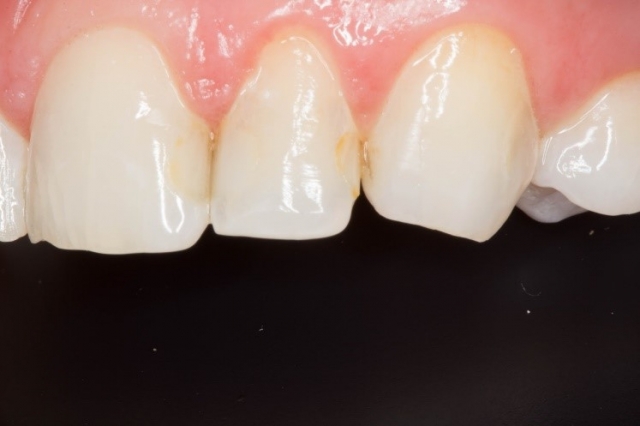
My final tip for photographing is that any time you see something that stands out during your photo series, it’s worth photographing.
Optional Photo of Patient’s Habit Position
Although not appropriate for every patient, I’ll often snap a quick photo of a patient’s habit position if you continue to watch them go into it when you tell them to close, and they go “edge to edge” instead of into their posterior occlusion.
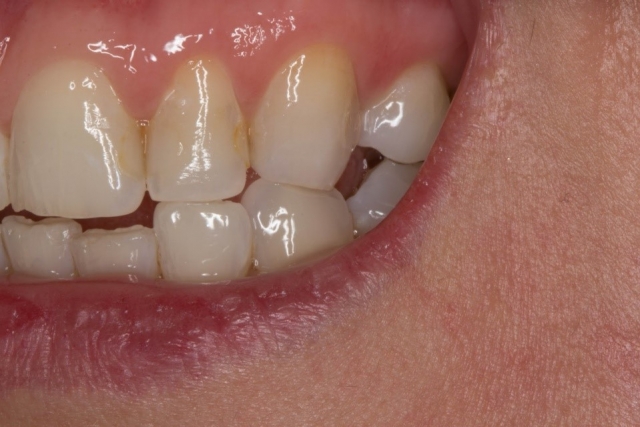
Anything that helps your documentation and future communication with the patient, specialist, or lab is worth taking. With digital photography (although storage and backup are topics for another day), taking as many pictures as you find useful is simple!
SPEAR campus
Hands-On Learning in Spear Workshops
With enhanced safety and sterilization measures in place, the Spear Campus is now reopened for hands-on clinical CE workshops. As you consider a trip to Scottsdale, please visit our campus page for more details, including information on instructors, CE curricula and dates that will work for your schedule.

By: Courtney Lavigne
Date: July 8, 2017
Featured Digest articles
Insights and advice from Spear Faculty and industry experts
