A Treatment Alternative for Retained Primary Molars
Here’s a case that may stick another tool in your toolbox. As a restorative dentist who treats primarily adults, it’s not uncommon for me to see young adult patients with retained primary molars that weren’t treatment-planned comprehensively for the long-term stability of the dentition.
Primary molars maintain a greater mesio–distal width than the adult replacement teeth and are much shorter than adult premolars. As a result, when retained, they can lead to canting of the adjacent teeth and supereruption of the teeth in the opposing arch.
When we see pediatric patients with retained primary teeth, it’s best to treatment-plan the case with the adult dentition in mind before orthodontics. When we don’t meet the patient until adulthood, what are our options?
Implants are certainly one option, and when the primary teeth are compromised from decay or existing restorations, they can be a good one. However, when the primary molars are intact, or if time, finances, fear, or other barriers to implant treatment make it a subpar solution, what else can we offer our patients?
This patient presented on referral from a periodontist with retained K and T. The patient opted to maintain the primary teeth and the periodontist suggested evaluating the occlusal consequences of that decision. To avoid canting or supereruption of the surrounding dentition, it was decided that we would wax up the primary molars to ideal occlusion and use matrices to restore the primary teeth in the mouth with composite.
Here are the steps to offer composite “crowns” for primary molars when they’re being maintained:
Prep work
- Take impressions of the maxillary and mandibular arches and a bite registration in maximum intercuspation.
- Have the lab complete wax-ups of the primary teeth to be restored, instructing the technician to wax the tooth/teeth to the existing occlusal scheme with broad interproximal contacts and light occlusal contacts. Let them know it is additive to complete chairside with composite without a finish line.
- Create a duplicate cast of the wax-up by taking an alginate impression of the waxed-up teeth and pouring it up in stone.
- Create a clear suck-down of the duplicate cast (I use 0.8 thickness).
- Trim the suck-down to incorporate the tooth in front and the tooth behind for stability.
Treatment
- Isolate the teeth using a rubber dam or Isolite.
- Air-abrade or roughen the surface of the entire tooth; remove any existing restoration. For added retention, occlusal potholes may be added. I would recommend this if the occlusal table is eroded and lacking enamel.
- Acid-etch enamel for at least 15 seconds; be sure not to etch adjacent teeth, or breaking contacts will be difficult.
- Copious primer over entire surface to be bonded to and scrubbed for manufacturer’s recommended time; air-dry.
- Adhesive over entire surface, air-thinned (again, be sure not to coat adjacent teeth for ease of breaking contacts), light-cured.
- Place composite into the occlusal surface of matrix and seat the matrix. You can add the composite to the matrix at the beginning if you have a light-safe cover. Place pressure on the matrix on the tooth mesial and distal to the one being restored, and light-cure.
- Hand-place and carve composite on the buccal and lingual surfaces.
- Finish and polish to remove any flash. Check and adjust occlusion as you usually would
- If necessary, break mesial and distal contacts first during the finishing and polishing stage (I use a flame-shaped fine diamond), and then if needed, I use Quikstrips by Kerr.
- Floss the contacts and complete final polishing.
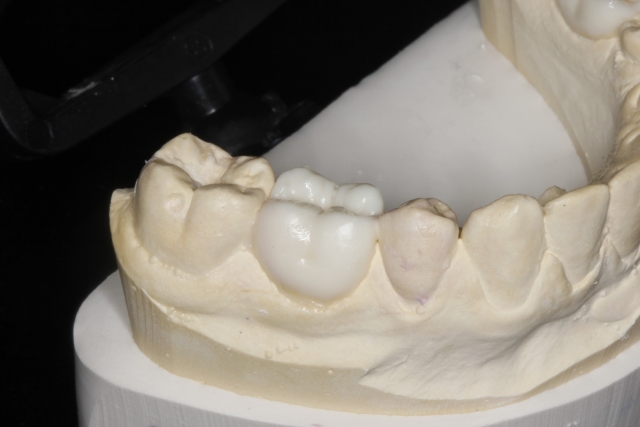
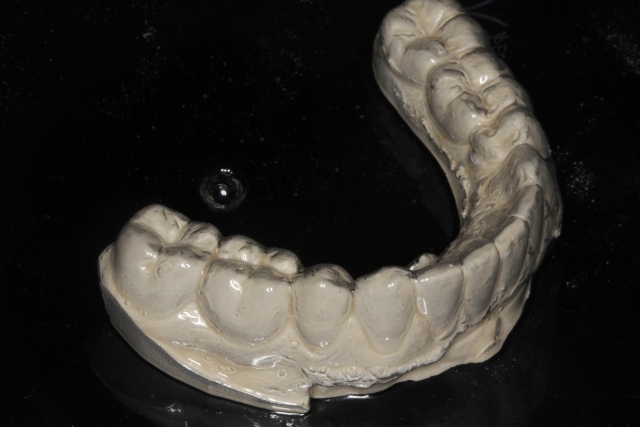


This should preserve the position of the surrounding teeth and can be a long-term solution to an otherwise compromised situation.
SPEAR ONLINE
Team Training to Empower Every Role
Spear Online encourages team alignment with role-specific CE video lessons and other resources that enable office managers, assistants and everyone in your practice to understand how they contribute to better patient care.

By: Courtney Lavigne
Date: March 7, 2018
Featured Digest articles
Insights and advice from Spear Faculty and industry experts
