Six Tips to Improve Your Occlusal Photographs
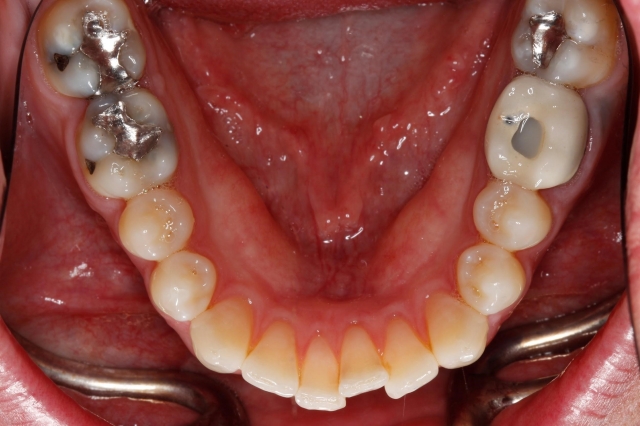
Photography is the single most important tool I have in my treatment planning process. From photos of decay when I open up a tooth, to preps, to final restorations, I take photos of everything. In fact, it was one of my key takeaways from Spear’s Facially Generated Treatment Planning workshop.
But as easily as a good photograph can educate and engage a patient, a bad photograph can do more harm than good. If you’re trying to show a patient something on a photo that they just can’t see, there’s less trust and understanding than a verbal explanation alone.
It took a lot of trial and error to get to a point in our practice where we can reliably take photos that show the patient what we see. Whether you’re not taking photographs, you’re new to taking photographs or you take them as often as you pick up a handpiece, I hope these tips can help in your daily practice.
Tip 1: Fight the Fog by Warming Your Mirrors
Fogging is one of the biggest barriers to a clear occlusal photograph. I’ve tried de-fogging sprays, warm water, water baths and blowing a stream of air; I’ve even gone as far as asking my patients to stop breathing. It goes without saying that there are messy disadvantages to all of these.
After much trial and error, I have found that using a heating pad to warm our mirrors is a game changer. We turn the heating pad on before seating the patient, put the mirror in the folded heating pad as we start our series of photos and, by the time we get to the occlusal shots, we’ve eliminated the stress of “moving quickly” to grab the picture before the mirror cools off. They stay warmer for longer, and you don’t have to worry about streaks or water spots remaining from liquid heating alternatives.
While we bought the heating pads at this link, any pad of similar size will do.
Tip 2: Retract That Lip
We’ve tried to get the lip out of the way with several different techniques, including cheek retractors at the 10 and 2 or 4 and 8 positions, small lip retractors on either side, and having the assistant manually retract the lip. While you may find success with these techniques, we’ve had the best luck with these:
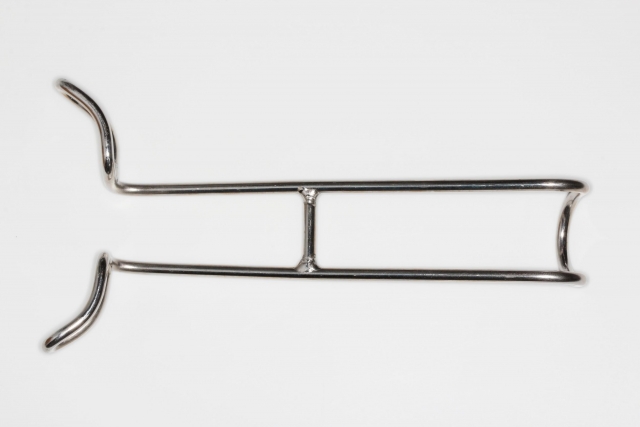
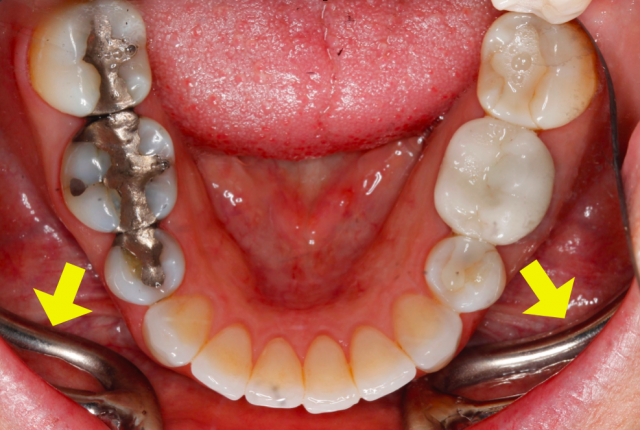
They’re occasionally too large for patients with limited ability to open. In these cases, we revert to the cheek retractors at 10 and 2.
You can find these retractors in metal or these retractors in plastic.
Tip 3: Use a Handle
I use manual focus on my lens and have both hands on the camera while I have my assistant position the mirror. The greatest benefit with the handle is to the assistant. It increases their control, allows them to stand further from the patient, and gives them the ability to see the entire set-up for the photo. When my assistant doesn’t use a handle, I find her fingers sneak into the borders of the picture, and she doesn’t position the mirror as well.
Here’s my assistant positioning the retractor and the mirror with the handle on herself:
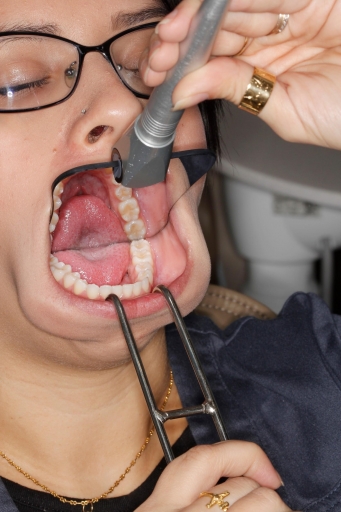
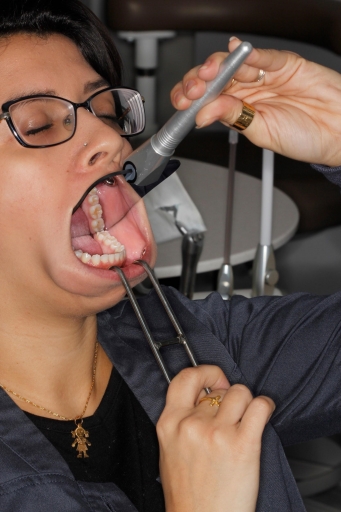
You can find my favorite handle at this link, and it adapts to all handle-less mirrors.
Tip 4: Explain What You’re Doing!
One of the biggest barriers to occlusal shots is – yes – the patient. In their defense, it’s intimidating to have people you’ve just met sticking large metal retractors and mirrors around in that small, dark space.
Every time my assistant is about to take an occlusal shot, as she removes the mirror from the heating pad and attaches the handle, I have developed a handy script that I run through. It goes a little something like this:
“The last two photos we’re going to take are going to show the biting surfaces of the teeth. In order to do that, we’re going to use a warmed mirror.”
Patients will often ask why it’s warmed, and it’s a good conversation piece while the assistant is setting up. As my assistant gets ready for her part, she shows the patient the lip retractor and explains that it is going to move their lip out of the way. She also lets them know that it works best if they relax their cheeks.
(Click this link to learn more about communicating with your patients.)
Tip 5: Your Biggest Big
The best way to see everything, including the second molars, is to have the patient open really wide.
I work at getting my framing and focus right while asking the patient to simply “open.” Because it takes a few seconds to get this just right, I don’t have the patient open as big as I need them to until the very last second. Right before I take the shot, I hit the patient with this line: “Open your biggest big!” and I snap quickly. You’ll get a surprising amount of additional opening with this little gem.
Tip 6: Scratch Free
We recently ran into an issue with scratches on our mirrors. Learn from our mistakes before you have to replace your mirrors like we did. When your mirrors start to scratch, your patients become more interested in the “black streaks on their gums” than the five-surface broken amalgams.
To keep the mirrors from scratching, you can use glass cleaner to wipe the mirrors or filtered reverse osmosis/de-ionized water. Instead of using paper towels (which will scratch your mirrors), we use 80/20 Polyester/Polyamide blend wraps for heat resistance and durability. I ordered the material and sewed the pouches myself, but you can email Dr. Gary DeWood at gdewood@speareducation.com for more information on ordering pouches or material squares.
Make sure the mirrors are completely dry before sterilizing. Avoid putting the mirrors in an ultrasonic cleaner as this is where the scratches occur most readily. Once the mirrors are dry and in their pouches, you can place them in the autoclave.
Photography is the easiest way to educate your patients, and the occlusal shots can be the most informative of all. I hope these tips help make some of these peskier shots smoother for you, your assistants and your patients. Please feel free to share your dental photography tips in the Comments section below.
Courtney Lavigne, DMD, Contributing Author – http://www.courtneylavigne.com
FOUNDATIONS MEMBERSHIP
New Dentist?
This Program Is Just for You!
Spear’s Foundations membership is specifically for dentists in their first 0–5 years of practice. For less than you charge for one crown, get a full year of training that applies to your daily work, including guidance from trusted faculty and support from a community of peers — all for only $599 a year.

By: Courtney Lavigne
Date: March 1, 2016
Featured Digest articles
Insights and advice from Spear Faculty and industry experts
