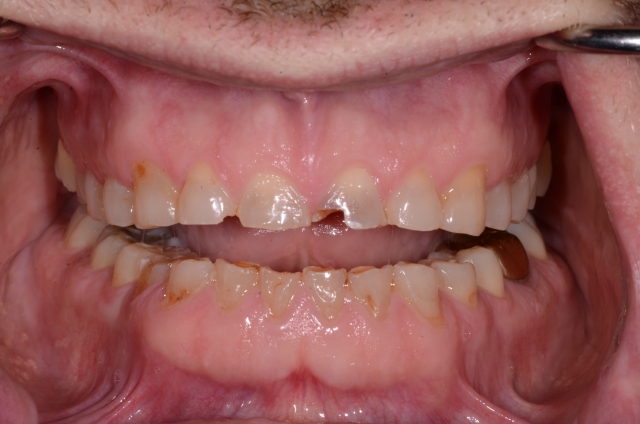
I love tooth wear. Sometimes worn teeth are the only reason that my patient decides to seek treatment. For most of these patients, the weakest link in their system is the teeth, showing the effect of strong muscle forces over time – well developed, powerful muscles combined with healthy joints that bear the load very well and have removed so much tooth structure that the teeth can sometimes be practically gone. My dilemma comes in trying to deal with those heavy forces as I try to give the patient back the teeth that he has worn away and will undoubtedly continue to wear away following my intervention.
I hate tooth wear. Worn teeth are a clear indication of what this patient is capable of doing to anything that I would put in position to be rubbed on, ground on and chewed with. Those powerful muscles rarely are uncomfortable and the TMJ is usually well within its adaptation limits. My dilemma comes in trying to deal with those heavy forces as I try to give the patient back the teeth that he has worn away and will undoubtedly continue to wear away following my intervention.
This love/hate relationship with tooth wear is one experienced by most of us throughout our dental career. The thrill of being able to restore function and esthetics to a grateful patient has been counter-balanced by the defeat of seeing that grateful patient crack, fracture and finally destroy all of our hard work. It doesn’t take too many of these experiences to create a neurally implanted “fear bomb” that erupts when gazing upon a severely worn dentition. Sometimes the fear is too much and they send those severely worn dentitions to their friendly prosthodontist, who immediately experiences pain and fear.
Throughout our Spear Continuum, beginning with the Facially Generated Treatment Planning workshop and continuing through Restoring the Edentulous Arch, we visit and revisit the observations and concerns about working with patients who present with severely worn teeth. Our differential diagnosis of the etiology of wear continues to evolve; the newest subject of consideration for me in that diagnostic process is the airway, and the more I learn about etiology, the better I feel about addressing the consequences. That discussion is, however, the topic of another Digest commentary.
That these dentitions must be addressed is the common factor, and the factor that created and continues to create the fear that my dentistry will be destroyed. Because I am in the process of doing that right now, I thought it might be fun to share some of it with you. Perhaps it will help me manage the fear. This is an interim report of my work with one such patient.
The Worn Dentition Patient: Paul
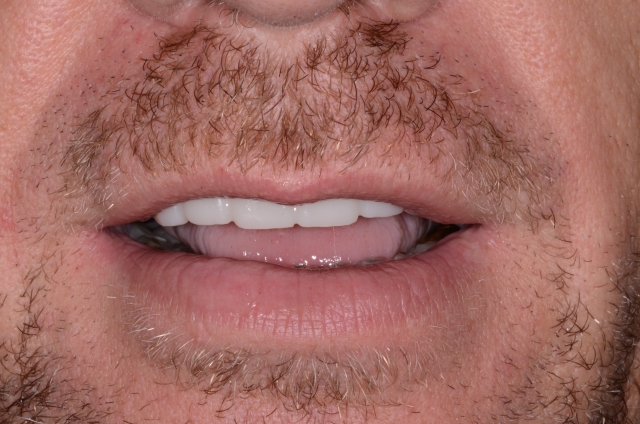
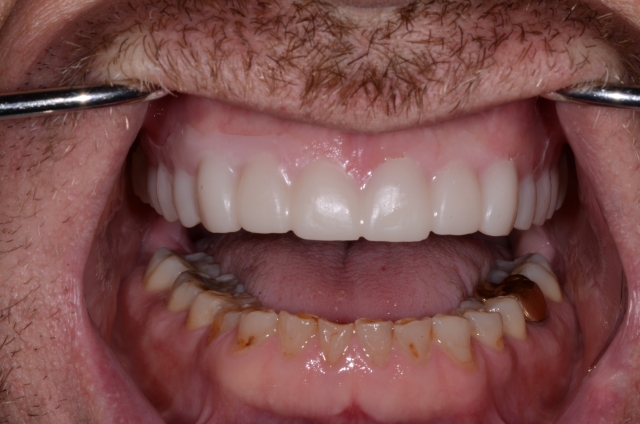
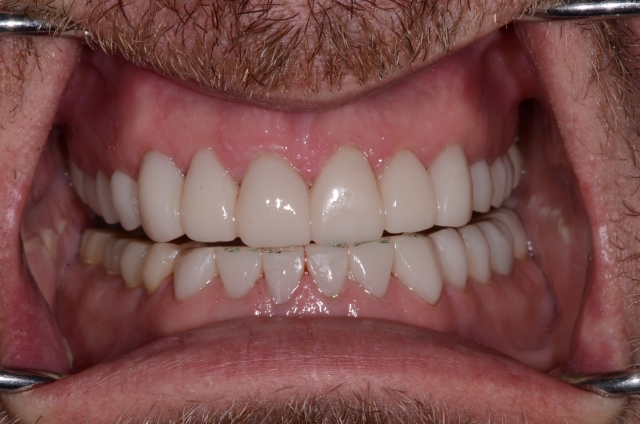
I met Paul because he asked me to look at his teeth and discuss what, if anything, could be done to improve his smile and function. Here are his initial images and the plan that I put together based on Facially Generated Treatment Planning.


Wax-ups and Mock-ups
Here is the wax-up completed by WinterLab based on my design. I asked that it be an additive-only wax-up so I could mock-up things easily and see what my ideas looked like prior to removing tooth structure. This also made it easy for Paul to see the hoped-for result.
(Click here for an article on segmenting a full-mouth diagnostic wax-up.)


Here is the “mock-up” on one set of mounted casts so I could look at the case in another way using the guides I had created.

Here is the mock-up and the first set of provisionals in place. We’ll hope for the best and begin to work through the process of evaluating the impact that his function and parafunction will have on them. As he breaks the cement loose and knocks them off, cracks them, fractures them into pieces or wears through them, we will adjust, reshape, redesign and replace in the hope that we can minimize the rate at which he destroys them. IF the etiology that I suspected has been addressed, maybe he won’t destroy them too quickly. He’s in these now, so I’ll keep you posted with a follow-up as soon as we decide to move forward with ceramics.


(If you enjoyed this article, click here for more by Dr. Gary DeWood.)
Gary DeWood, D.D.S., M.S., Spear Faculty and Contributing Author