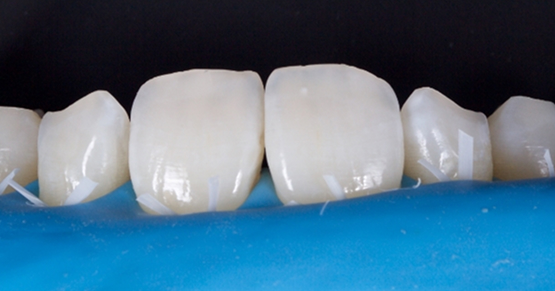
The ‘Trial Smile’ Overlay Template
The “Trial Smile” is a common term for evaluating a change in the position of the teeth and appearance of the smile. Patients and dentists commonly use a Trial Smile to compare an individual’s existing or pre-treatment smile appearance to the improved change that a proposed outcome of restorative and/or collaborative dentistry will create.
Many different fabrication techniques have been used to create the Trial Smile. It can be performed intraorally (direct) or extraorally (indirect). The direct technique includes free-hand application of composite resins to the undersized or mal-positioned teeth to alter dimension or arrangement.
No adhesion process is typically utilized to permanently attach the composite to the teeth. Once the composite is applied, the patient can view the proposed smile changes.
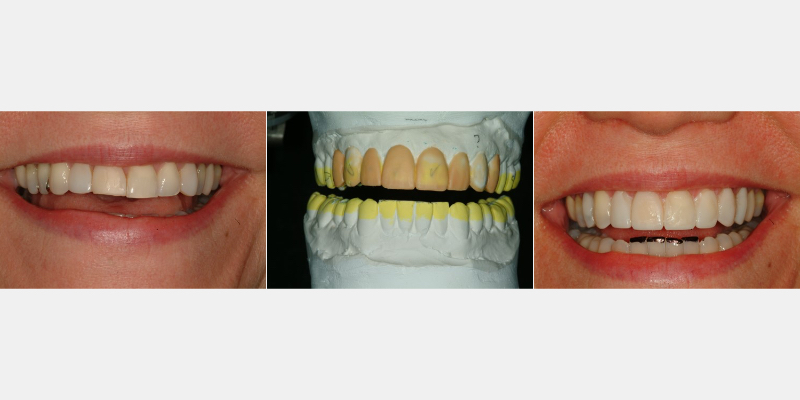
The most common indirect technique is fabricating a diagnostic wax-up that alters the size and position of the anterior teeth. An index (silicone or vacuum-formed) is fabricated over the diagnostic wax-up. A provisional material like bis-acryl is placed into the index and applied over the patient’s teeth to create the intraoral Trial Smile.
Once the bis-acryl is hard, the index is removed, and the remaining Trial Smile can be assessed. Each technique has some limitations, but the goal is to allow the patient to preview the proposed esthetic changes available through collaborative restorative dentistry.
Limitations of Traditional Trial Smile Techniques
Direct techniques are challenging and time-consuming. Creating changes to the tooth contour and position using composite resins is freehand, requiring patience and skill. Additionally, they require significant chair time to complete.
The phrase “time is money” is accurate when creating Trial Smile templates with this technique. While the outcome can be beautiful, there is no guarantee that the patient will accept the proposed changes and proceed with treatment. The chair time spent fabricating the Trial Smile is costly; if actual treatment does not follow, there is a significant loss of income. As powerful as this Trial Smile technique may be to motivate patients toward treatment, it only takes a few “no” responses from patients and the lost production before the practitioner will avoid suggesting the technique for future patients.
Indirect techniques also have downsides. As I said earlier, a diagnostic wax-up is commonly used to determine changes in tooth size and position. While wax-up provides accuracy and realism, it is also significantly expensive. A Trial Smile constructed from the wax-up will dramatically change the patient’s appearance. But, again, the expense of creating the wax-up may deter many patients from committing to treatment.
Suppose the goal is to use a Trial Smile to motivate patients to commit to restorative therapy. In that case, it is more appropriate to have the patient observe the Trial Smile, get motivated, and then approve and accept the diagnostic wax-up as a tool for definitive therapy. Most dentists are reluctant to spend on a diagnostic wax-up if patients are not committed to the recommended treatment. But there is an alternative Trial Smile technique that may be applied!
A Simple, Cost-Effective Alternative: The Overlay Template
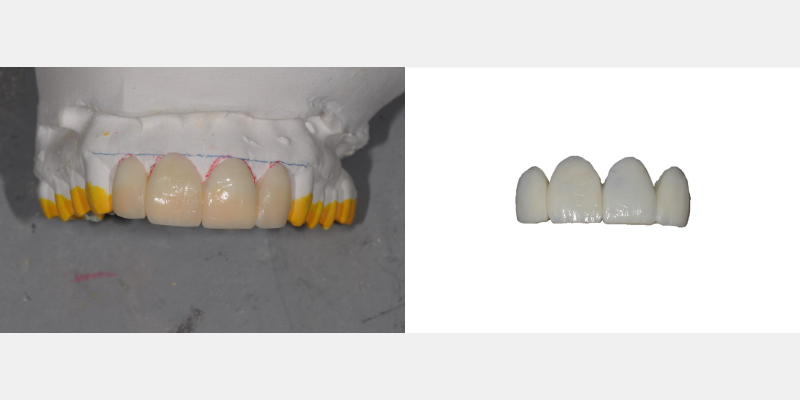
One Trial Smile technique that is often overlooked and underutilized is the overlay template. This indirect technique is simple to fabricate and does not require the fabrication of a diagnostic wax-up. This template technique may be utilized to evaluate tooth position change, size alteration, gingival contours, and even color or shade changes. It is very versatile and inexpensive. It only requires applying treatment planning concepts and a few minutes of the dentist’s time and energy in the office dental lab area. I have found it a great communication tool for patients to understand and accept restorative treatment better.
The Trial Smile overlay template technique is indirect. The dentist must obtain patient photographs and diagnostic casts (preferably facebow-mounted). I would also recommend that you get a photo of the proposed tooth shade changes. With these records, the overlay template can be fabricated easily and accurately.
The overlay template will take 15-20 minutes to fabricate and be ready for patient application. I find it efficient, effective, and well-received by patients!
The material of choice for fabricating the overlay template is Revotek LC. It’s a light-cured composite resin designed for use as a provisional.
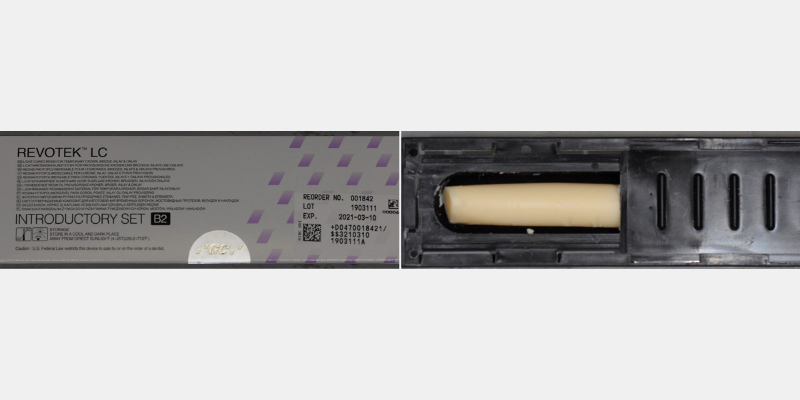
Revotek LC is made and distributed by GC America. It is a shapeable composite material with a firm consistency. Since it is light-activated (cured), there is enough working time to manipulate and contour the shape and form of the proposed changes before hardening. The material comes in stick form in a light-proof container, and a spatula is provided with the kit.
The material is relatively inexpensive. While there is only one shade available (approximately VITA A1), it is possible to apply conventional composite resin of a different shade on the cured surface if a shade change is required.
I’ll describe the technique of fabricating the Trail Smile overlay template using a recent patient case in which I was contemplating orthodontic intrusion and restoration of the lower teeth. The patient, Nancy, was new to my practice and wanted to improve her smile and function.
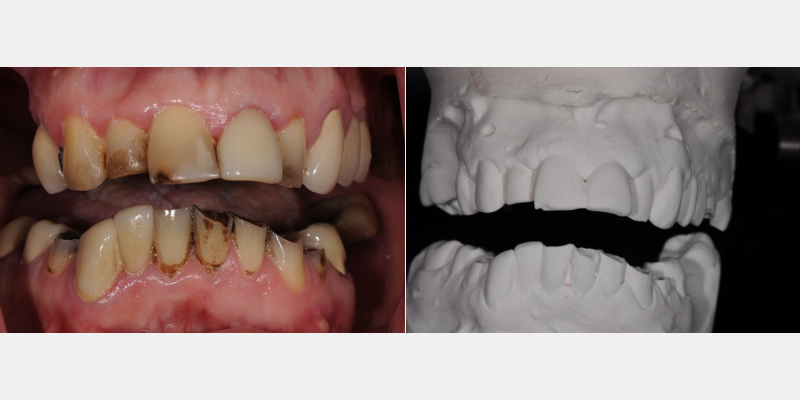
The patient had ignored her dental health in recent years but decided that improving her health was essential to retain her existing teeth. She really disliked the appearance of the over-eruption of her lower teeth and was embarrassed to smile.
Obviously, significant collaborative treatment planning was involved in the case. In this article, I cannot get into the overall treatment plan. However, the patient wanted to see the outcome of her treatment. An overlay template helped her see the possibilities and motivated her to pursue collaborative treatment. As a side note, Facially Generated Treatment Planning concepts and templates must be integrated into the planning and design of the patient’s proposed outcome.
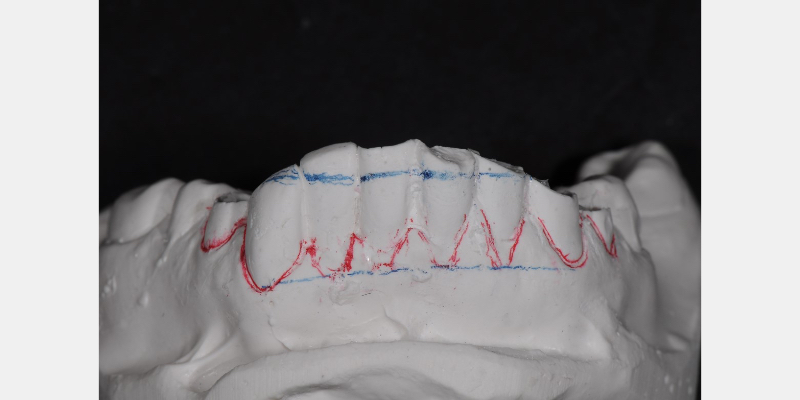
The necessary photographs and models of the teeth were obtained. Following the guidelines created from the FGTP templates, the appropriate incisal edges and future gingival margins were drawn on the casts. The casts were then coated with a stone separator material to allow the overlay template to be removed from the casts once they were fabricated.
There are many different stone-separating materials available. Two common separators that I use frequently are from COE-SEP and Great Lakes. Both products are brushed onto the casts and air thinned. They do not have to be completely dry to continue with the technique.
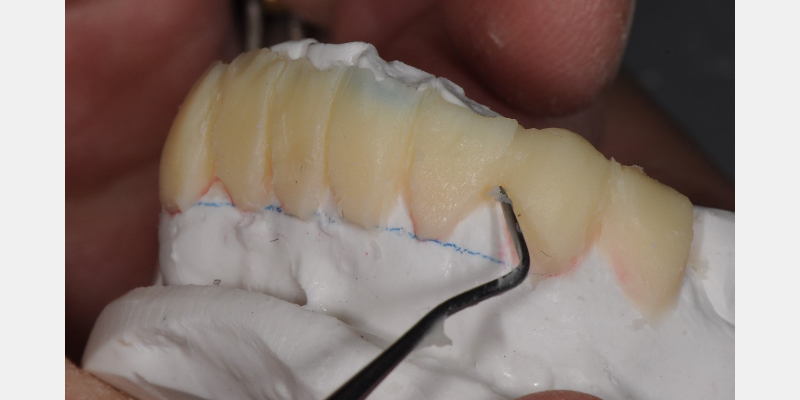
After the casts are lubricated with the separator, an appropriate amount of Revotek LC is removed from the package. The amount you’ll need to use varies depending on the number and extent of the teeth involved. When applying the Revotek to the model, the goal is to create a template approximately 1.0 mm thick.
With that goal in mind, the “ball” of Revotek removed from the case is thinned across the casts of teeth to approximate 1.0 mm thickness. This thinness also allows visualization through the material of the incisal edges and gingival contours scribed on the cast.
Once thinned and applied to the cast, the Revotek is sculpted to the appropriate contours, positions, and shapes of the proposed restoration. I like sculpting the template with a Hollenback carver. I thin and remove the uncured revote to approximate the proposed tooth outlines. The addition and subtraction of the uncured material is possible.
Once the contours are acceptable, the cast and Revotek must be light-activated (cured). This may be accomplished with a curing wand, but it is most efficient to place the cast into a light-curing oven (e.g., Triad oven). Total hardening (cure) time is about two minutes. Once cured, the cast is removed from the oven, and the template is ready to be trimmed and polished.
The overlay template must be gingerly removed from the cast. Fracture of the connectors (contacts) is the concern. I use the pointed end of the Hollenback to “free up” multiple areas of the template from the cast. As individual areas are released, I move to another. Eventually, with caution, the template is removed from the cast in one piece (though it is possible to reattach broken segments using a flowable composite).
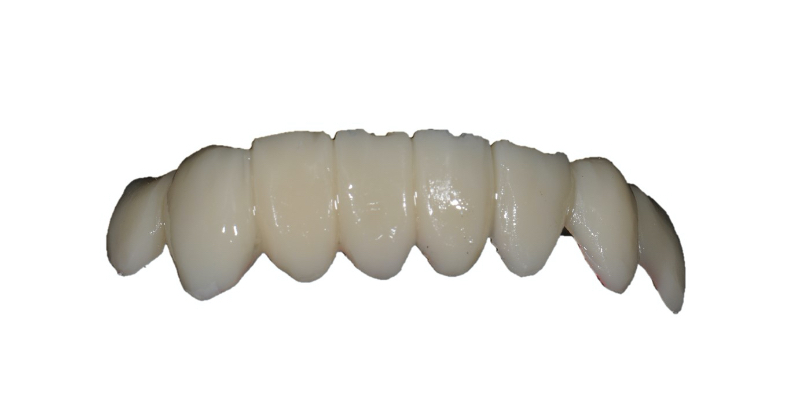
Trimming and polishing the fragile template can be challenging. I use a combination of discs, rubber wheels, diamond discs, and carbide burs at low speed in my laboratory motor (or straight chairside handpiece).
If adequate time was taken during sculpting, minimal finishing with burs and discs is necessary. Polishing a thin template is virtually impossible. Therefore, the final luster is achieved using an overlay glaze material such as GC Optiglaze (GC America) or Palaseal(Pala by Kulzer). Either will create a shine and luster that mimics tooth reflectivity and appearance.
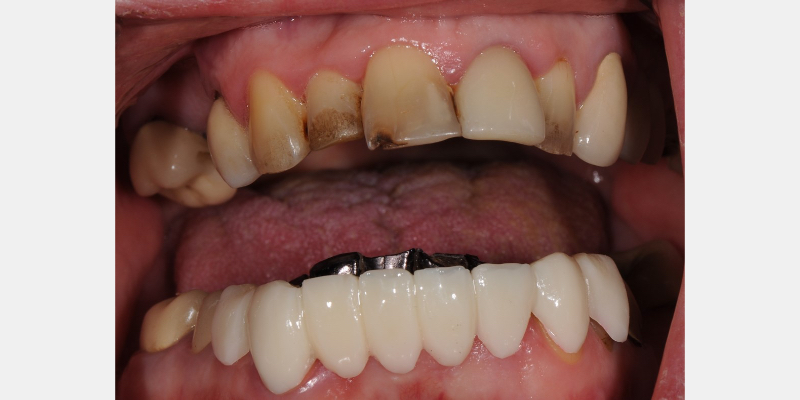
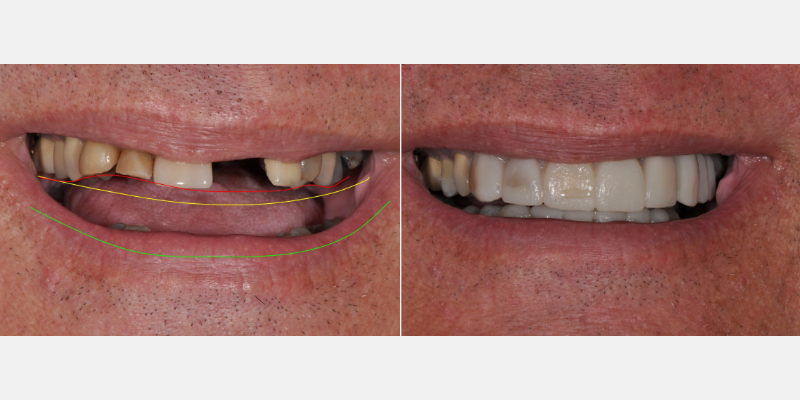
When the patient is re-appointed for the Trial Smile consult, the overlay template is “snapped” into place. The patient may now visualize the proposed changes and contours.
In this patient’s case, the extruded teeth were “Sharpied” to visually eliminate the appearance of the incisal edges. The overlay template allows the patient to visualize the proposed outcome. In my experience, these overlay templates provide vision, reassurance, and motivation for patients to proceed with esthetic and collaborative treatment.
Helping Patients See — and Believe — in Their Future Smile
To sum up, the Trial Smile overlay template is a simple, convenient, cost-effective, and non-invasive tool for providing patients with the opportunity to visualize potential appearance changes to their teeth and tissues. I encourage all dentists to utilize this technique and tool in their esthetic treatment planning.
SPEAR campus
Hands-On Learning in Spear Workshops
With enhanced safety and sterilization measures in place, the Spear Campus is now reopened for hands-on clinical CE workshops. As you consider a trip to Scottsdale, please visit our campus page for more details, including information on instructors, CE curricula and dates that will work for your schedule.

By: Jeffrey Bonk
Date: May 11, 2020
Featured Digest articles
Insights and advice from Spear Faculty and industry experts
