The Occlusal Plane Guide

When communicating the desired tooth position to the dental technician for a diagnostic wax-up, the more accurate and detailed the information provided can be, the more accurate the diagnostic wax-up will be. Given that the diagnostic wax-up will be used to fabricate the provisional restorations, increasing the accuracy of the wax-up will save the clinician time back in the operatory.
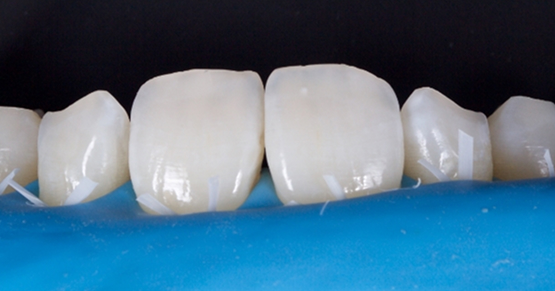
Nothing can be more disruptive than fabricating provisionals for a patient that turn out to have a canted occlusal plane, are too short or have a problem with the midline. In order to provide accurate information to the technician, clinical photos are crucial. In a majority of cases, there are reference points that can be used to help guide the technician in the diagnostic wax-up (ie. teeth or tissue that is already in the correct position or close to the correct position). However, there are times when there are no references. (Figs. 1-2)
In this patient, the entire occlusal plane needs to be lengthened. How do you communicate to the technician where to wax the teeth? Although we can communicate where to place the maxillary central incisors (in this example I desired to lengthen the centrals 3mm), how does this relate to the desired position of the laterals, canines, premolars and molars?
The Use of an Occlusal Plane Guide

A technique that can be extremely helpful for communicating tooth position in situations where significant changes are desired in the occlusal plane (either lengthening or shortening) is the use of an “Occlusal Plane Guide”.1 The concept of the occlusal plane guide was derived from the concept of using a wax occlusal rim when determining tooth position for complete dentures. (Figs. 3-4)

However in the dentate patient, 1mm Biocryl is pressed over a model of the maxillary arch and Triad is added to check and correct the occlusal plane in the mouth. (Figs. 5-7)

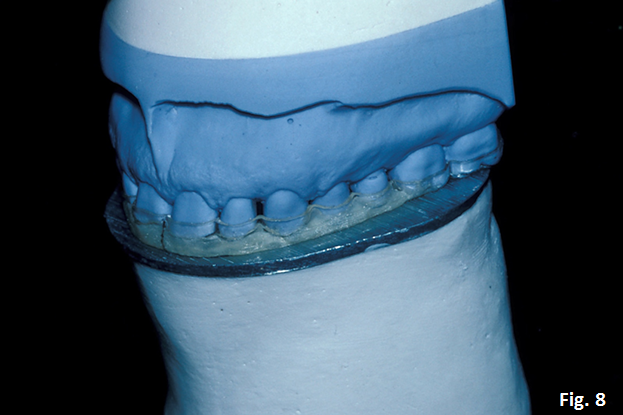
Once the desired tooth position is established and verified in the mouth with photos, the occlusal plane guide is sent to the technician to aid in developing the new occlusal plane in the diagnostic wax-up. The technician can attach the occlusal plane guide to the previously mounted upper model and after removing the lower model from the articulator, mount a “flat plane” against occlusal plane guide (in this example, it’s a mounting plate that has been turned upside down). (Fig. 8)

The instructions to the technician are to wax the incisal edges and buccal cusp tips of the maxillary arch to touch the flat plane (a natural Curve of Spee can be added to the distal buccal cusp of the first molar and in the second molar region). (Figs. 9-10)

Once the maxillary occlusal plane has been waxed, the table can be removed and the lower model replaced to finish the wax-up. (Figs. 11-12)

Taking this “additional” step to create the occlusal plane guide is a great way to help assure that the provisional restorations are created in the correct plane of space anterio-posteriorly and mesio-distally. (Figs. 13-15)

Again, the more accurate the diagnostic wax-up can be, the more accurate the provisionals will be, and the easier it will be to get the correct tooth position in the definitive restorations. (Figs. 16-17)
References
The acrylic occlusal plane guide: A tool for esthetic occlusal reconstruction. Phillips K, Morgan R. Compendium Contin Educat Dent 2001 Apr;22(4):302-4
SPEAR campus
Hands-On Learning in Spear Workshops
With enhanced safety and sterilization measures in place, the Spear Campus is now reopened for hands-on clinical CE workshops. As you consider a trip to Scottsdale, please visit our campus page for more details, including information on instructors, CE curricula and dates that will work for your schedule.

By: Greggory Kinzer
Date: December 17, 2014
Featured Digest articles
Insights and advice from Spear Faculty and industry experts


