Customized Video Playlists User’s Guide
Whether it’s to showcase your work, announce your practice’s events or promote new services, consider creating a customized lobby video playlist using Spear Online’s award-winning patient education platform.
A custom playlist is a collection of videos and image files. This guide provides step-by-step instructions to successfully integrate your practice’s images into a lobby video playlist to create a customized educational experience for your patients.
First, here are some examples of images you can incorporate into a custom playlist:
- Practice logo
- Before and after photos of the work you’re most proud of
- Past event recaps/photos.
Login to Spear Online
- Login to Spear Online.
- Go to the Patient Education home page.
- Click the “Chairside” tab, then select the “Playlist” link.
- Choose an existing playlist to edit or add a new playlist if none exist.

Create a New Playlist
- Choose “+ New Playlist”
- Browse through a listing of chairside and lobby videos using the scroll bar or use the search bar to search videos by keywords. You can also sort and filter by video type and category, saving it as a favorite.
- To add a video, select the “+” icon.
- A video that is already part of a playlist will have a green checkmark next to it.
- Once you are done picking videos, click “Save and View Playlist.”
Add an Existing Playlist

- Choose an existing playlist to edit from the list.
- The custom playlist editor will open with options to add or remove slides. To begin customizing a playlist, use either the plus-mouse cursor within the carousel or click “Add Slide” to insert new images.
Add Images
Additional Spear chairside and lobby videos may be added by selecting the “Video” option or select the “Image” option to upload your images to the media library for use within the playlist. If you select the “Video” option, more than 200 chairside and lobby videos will be visible. You can browse through the list or use the search bar to search by keywords. You can also sort and filter by video type and category, saving it as a favorite. You can add as many patient education videos as you want, and you can move them around in whichever order you want by dragging and dropping within the carousel.
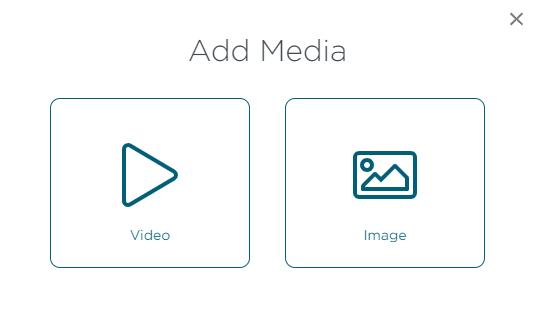
If you select the “Image” option, use the media library to manage and search for previously uploaded images or add new images by dragging and dropping or by clicking the “Select Files” link. Remember, the images must be a .png or .jpg file no larger than 10 megabytes.
Turn a Slide into an Image: Did you know you can easily turn a PowerPoint, Keynote or a PDF file into a compatible image for the media library? Open a document in PowerPoint, Keynote or Acrobat and select “Save As” then navigate to a location. The desktop is often easiest if you plan to drag and drop the file into the Spear media library. Next, name the file, then underneath the file name field, click on the “Save as type” drop down menu to select either “JPEG Format” or “PNG Format.” Once your slide or PDF page is saved as a .jpg or .png image, you can drag and drop the file into the Spear media library for easy uploading.
Media Library
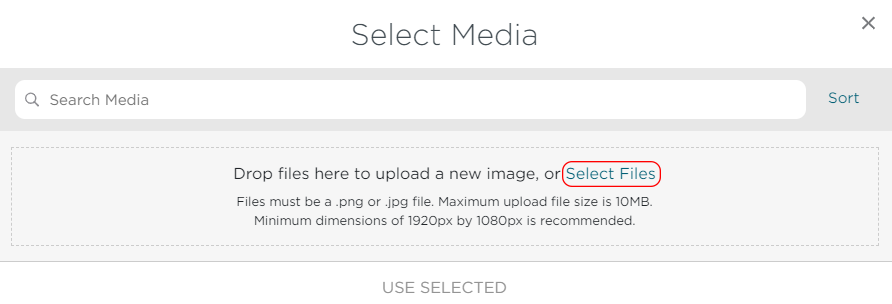
Use the media library to manage all image assets. Remember, uploaded images must be a .png or .jpg file no larger than 10 megabytes.
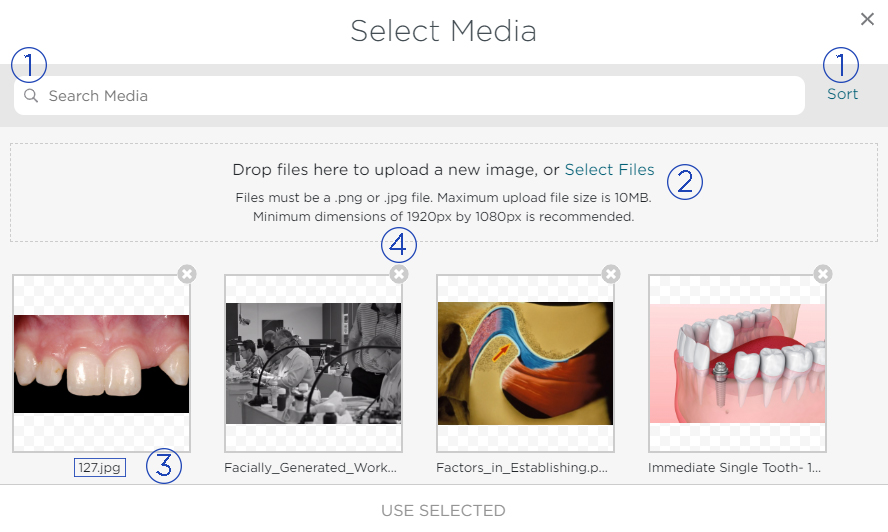
- Search the media library using the search bar by keywords or click “Sort.”
- Drop files to the page to upload a new image or click “Select Files” and navigate to the .png or .jpg image.
- Rename an image file by clicking once on the current name then type a new name when text turns blue.
- Delete an image file by clicking on the “x” icon. If an image is in use, the delete option will be gray and a notification indicating deletion is not available is shown.
Edit Mode
Once you’ve selected an image for use from the media library, use the corner squares to resize it for optimal width and height. Note the aspect ratio of the image will be retained for optimal viewing/display.
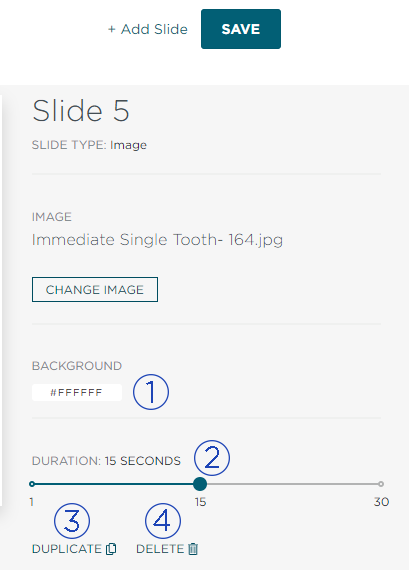
There are several slide editing options you can choose when you are creating or editing a playlist:
- Modify the background color
- Modify the duration of the slide transition
- Duplicate a slide
- Delete a slide.
When you’re finished and you’ve got all the videos and slides in the order that you want, click “Save.” A confirmation message will display with an option to continue editing or to view your custom playlist.
When you exit the edit mode and save the custom playlist, you can view it in the order it will be shown in the lobby through Apple TV or Fire Stick. If the list doesn’t automatically refresh, simply click the “Refresh” button to see it in the updated list.
If streaming the custom playlist through AppleTV or Fire Stick, use the toggle to turn audio on or off.
If you want to delete a playlist, from the Playlist tab, just click on the name of the playlist you want to delete and select “Delete Playlist” from the more options ellipsis icon.
Consider creating multiple playlists, to target audiences you’re expecting based on scheduling. For instance, if hygiene appointments are in the morning create a playlist about periodontal disease, home care or discounts you provide on whitening procedures. If surgeries happen on Tuesdays, set up a playlist to show pre-op and home care instructions, patient testimonials, and before-and-after photos.
SPEAR ONLINE
Team Training to Empower Every Role
Spear Online encourages team alignment with role-specific CE video lessons and other resources that enable office managers, assistants and everyone in your practice to understand how they contribute to better patient care.

By: Spear Support
Date: November 11, 2019
Featured Digest articles
Insights and advice from Spear Faculty and industry experts
