Modifying an Anterior Bite Plane With DURASPLINT LC
In a previous article, I discussed the problem we’re all experiencing as a result of losing Triad Provisional Material in the fabrication of anterior bite planes. In that article, I propose several possible solutions, including using DURASPLINT LC as a direct replacement for the Triad product.
In this article, I will describe the steps necessary to add additional material to a previously fabricated anterior bite plane.
Figure 1a below shows the same anterior bite plane fabricated in the previous article, only now at the patient’s one-week follow-up visit. For this image, I asked the patient to close normally. To create the image in Figure 1b, I asked the patient to slide forward, backward, and squeeze, allowing both condyles to sit more fully into the fossae.

At the initial insertion appointment, this patient demonstrated generalized muscle pain and could not move her mandible nearly as far as she could at the follow-up appointment. While this was good news and probably the result of the lateral pterygoids releasing, clinically, the mandible could retrude relative to the maxilla and the occlusal table of the anterior bite plane.
The circles in Figure 1b highlight the cusp tips of the mandibular canines nearly “falling off” the occlusal table. Clinically, I observed the cusp tips approaching the palatal border of the appliance. I was concerned that the mandible dropping back further might allow the cusp tips to lock in behind the appliance. As a result of the patient’s improved range of motion, I decided to add some material to the previously fabricated anterior bite plane.
Figure 2 demonstrates my goals for the modification. I didn’t need to add any more volume to the appliance’s facial aspect, but I did want to add some material to the palatal aspect without disturbing the comfort the patient had already been experiencing.

Clinical Steps for Adding Material to the Bite Plane
1. Prepare the Anterior Bite Plane for Bonding the Additional Material
First, the appliance was air-abraded using aluminum oxide to roughen the surface. Next, the adhesive component of a three-step bonding system (Optibond FL, Kerr) was painted on the area I added and light-cured.

2. Apply the Additional Material
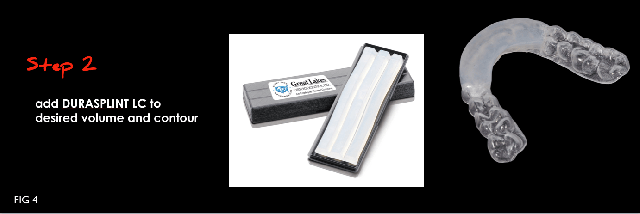
An appropriately sized mass of DURASPLINT LC was positioned and manipulated by hand to approximate the desired contour. The addition was then light-cured.

3. Refine the Occlusion and Polish
The occlusal design of the anterior bite plane is intentionally simple. The guidance is flat and smooth, resulting in an appliance that discludes the posterior teeth and can be efficiently adjusted. Following clinical adjustment, the appliance was finished with a rubber wheel (Preat), and a glaze layer was applied.

The appliance was again micro-abraded with aluminum oxide for the glaze application and then cleaned with steam. Then, Optiglaze (GC) was applied with a brush and light-cured. (Don’t get carried away with the steamer and thermoplastic materials like Splint Biocryl.)
The resulting modified anterior bite plane is shown clinically in Figures 6 and 7.


When selecting an appropriate bite appliance, the ability to modify the appliance is always a consideration. With this technique, the addition modification was easy to perform and relatively quick, and in this case, the two layers merged almost seamlessly.
Of course, the point of this article isn’t to discuss when or even how to use an anterior bite plane. Rather, the goal of this article is to demonstrate a technique for adding material to an existing appliance using an alternative to Triad Provisional.
I hope this article is helpful when you use anterior bite planes with your patients.
VIRTUAL SEMINARS
The Campus CE Experience
– Online, Anywhere
Spear Virtual Seminars give you versatility to refine your clinical skills following the same lessons that you would at the Spear Campus in Scottsdale — but from anywhere, as a safe online alternative to large-attendance campus events. Ask an advisor how your practice can take advantage of this new CE option.

By: Darin Dichter
Date: January 6, 2017
Featured Digest articles
Insights and advice from Spear Faculty and industry experts


